Inventor Widgets
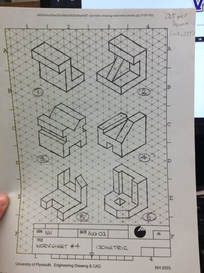 Figure 1 Figure 1
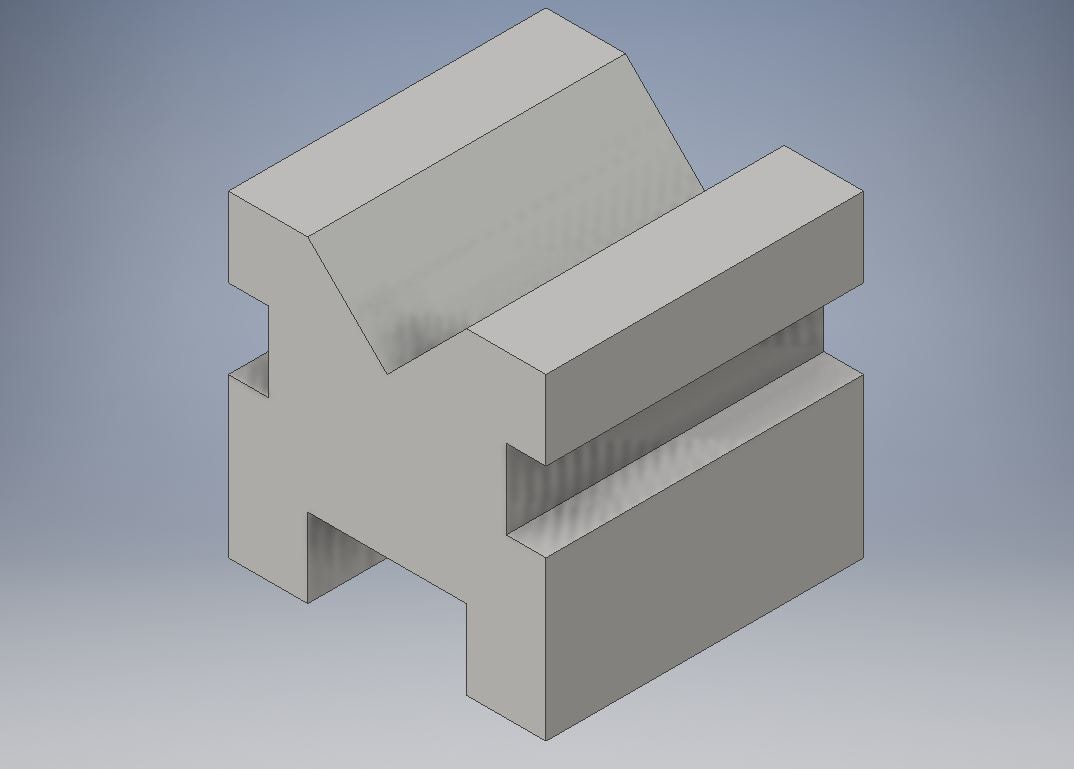
Inventor is a computer program that allows a person to draw in 3 dimensions to create 3D objects. For this project we were tasked with drawing six widgets in Inventor (See Figure 1). In order to make an object in Inventor one must follow three simple steps: Sketch the object, make the sketch have the proper dimensions, and make the sketch 3D. When I drew Widget 3, I used the more specific steps below. (In order to begin, open inventor, and click the standard option for your drawing.)
Draw: To start, click the start 2D sketch from the tool bar (figure 2) and then click the (x,y) plane. After doing so, click the line tool (also figure 2). Begin to draw the basic shape of one of the sides of the widget (one face of the 3D object). Draw green lines such as the lines in Figure 3, and do not forget to close the shape that you are drawing. |
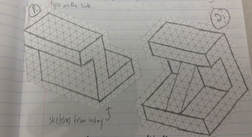
This picture is of two sketches I did in my designer notebook. I doubled the scale for my sketches; every two triangles in my sketch equals one triangle in the original drawing. In other words, in my scale every two triangles equals .25 inches whereas in the original every one triangle equals .25 inches.
|

Figure 2
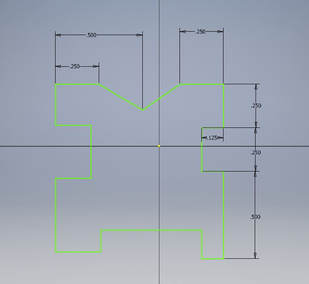 Figure 3
Dimension:
After closing the drawing, select the dimension tool from the toolbar (figure 2). Doing so will let you begin step 2, making sure that the drawing is the correct size. According to Figure 1, every side of the triangle grid represented .25 inches. Using this scale, one can correctly dimension the shape. After selecting the dimension tool, click the line you are trying to dimension and drag your mouse. Doing so will drag the black lines out. Clicking on the number value in the black lines will allow you to change the dimension to the value you need. After doing this for every line, you have finished the dimension stage and you can select the finish sketch from the toolbar (figure 2).
After closing the drawing, select the dimension tool from the toolbar (figure 2). Doing so will let you begin step 2, making sure that the drawing is the correct size. According to Figure 1, every side of the triangle grid represented .25 inches. Using this scale, one can correctly dimension the shape. After selecting the dimension tool, click the line you are trying to dimension and drag your mouse. Doing so will drag the black lines out. Clicking on the number value in the black lines will allow you to change the dimension to the value you need. After doing this for every line, you have finished the dimension stage and you can select the finish sketch from the toolbar (figure 2).
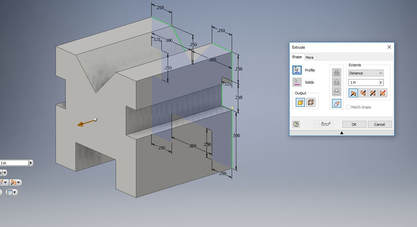 Figure 4
Extrude:
In order to extrude an object, one must select the extrude option from the (now different) toolbar. It will be located directly to the right of the Start 2D Sketch option. After doing so, an image similar to the one in Figure 4 will appear. (Since it automatically chooses adding material don't worry about whether or not you are adding or taking material away for this widget.) Then, all you have to do is select the extruding length (in the pop up menu) so that it matches the proper dimensions.
In order to extrude an object, one must select the extrude option from the (now different) toolbar. It will be located directly to the right of the Start 2D Sketch option. After doing so, an image similar to the one in Figure 4 will appear. (Since it automatically chooses adding material don't worry about whether or not you are adding or taking material away for this widget.) Then, all you have to do is select the extruding length (in the pop up menu) so that it matches the proper dimensions.
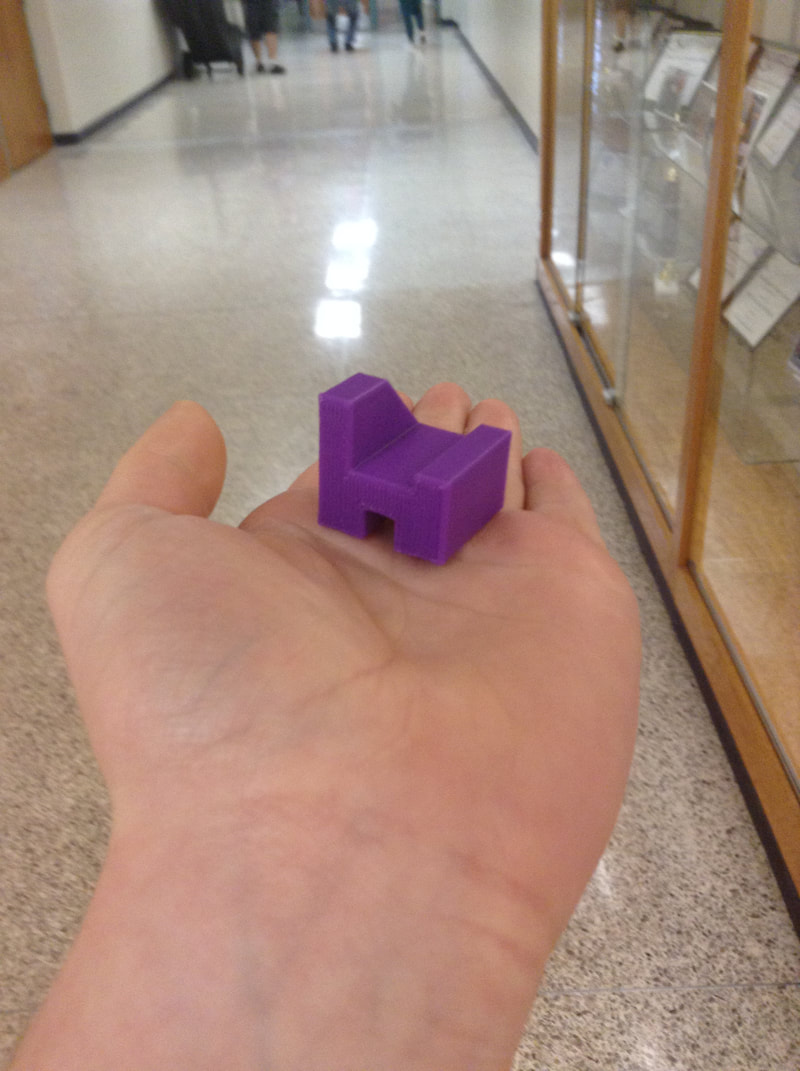
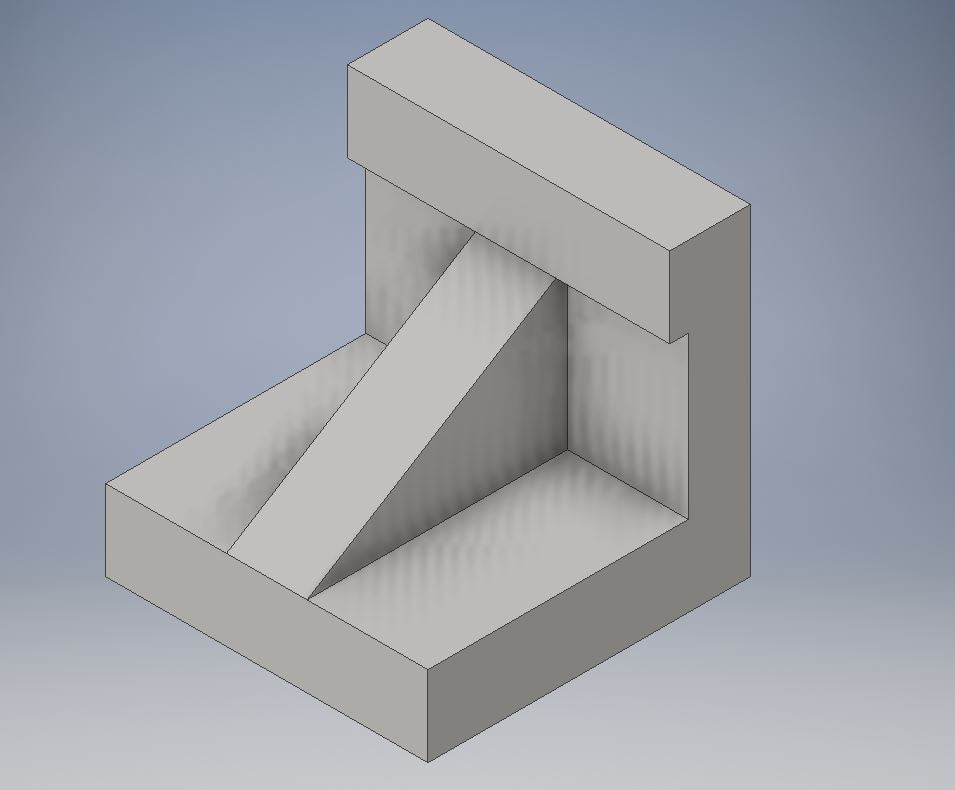
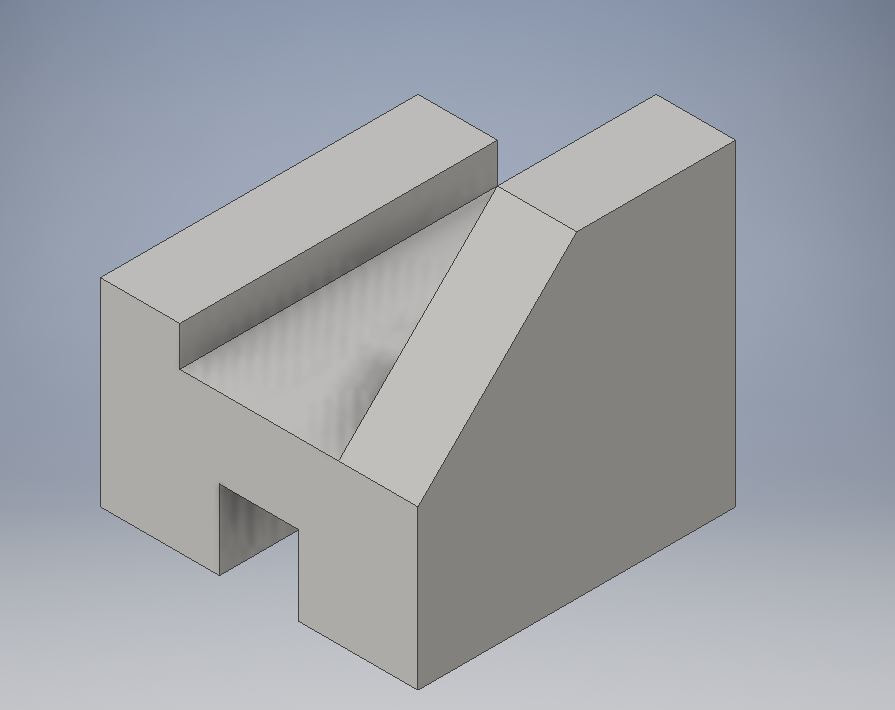
The finished drawing:

After drawing the widgets in inventor, one must transfer the 3D drawing into a program that the 3D printer can understand. This program is called MakerBot Desktop. Once the drawing is in the program (which includes changing the file type of a widget to an .stl file), there are a few simple steps before one can go on to printing the widget on a 3D printer).
|
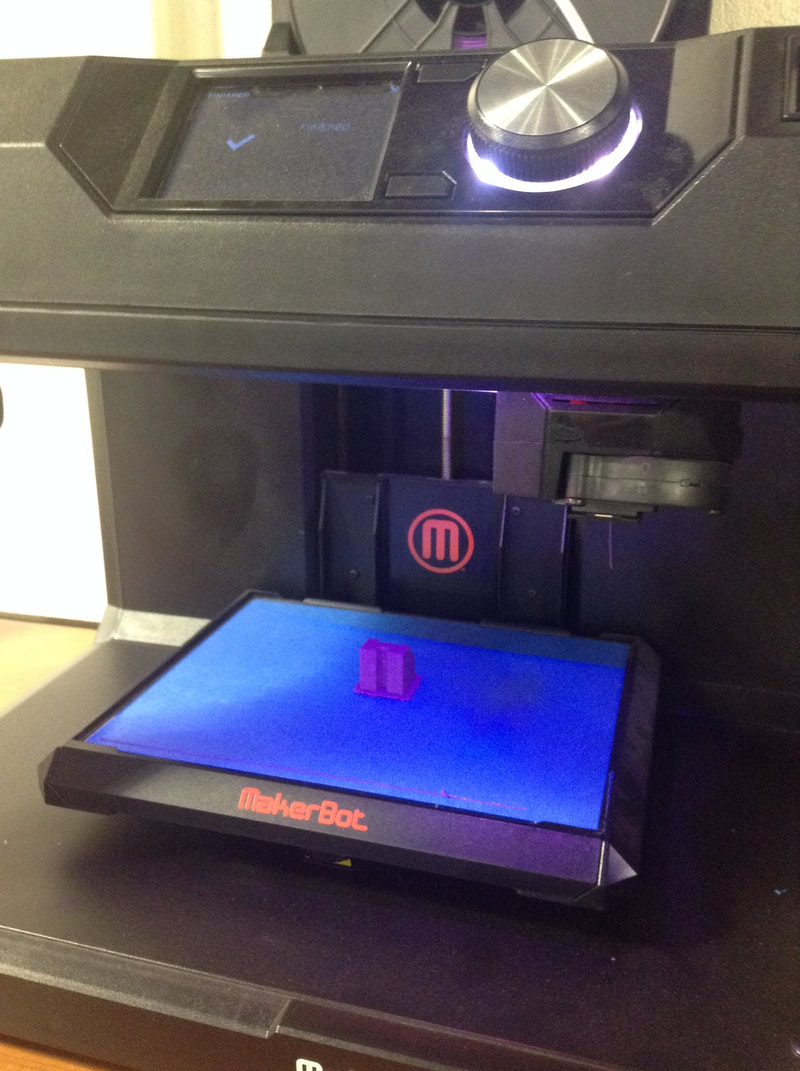
When the widget is first uploaded it will appear very small in Makerbot Desktop. To change this, click the bottom link (the red one in Figure 5) and make sure to click the right arrow that will appear off of the selected box. This will bring up the dimension window. Once this is selected, change the scale from 100% to 1000%. This stops the selected widget from appearing so small.
|
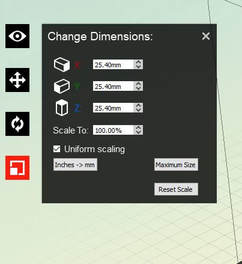
Figure 5
|
|
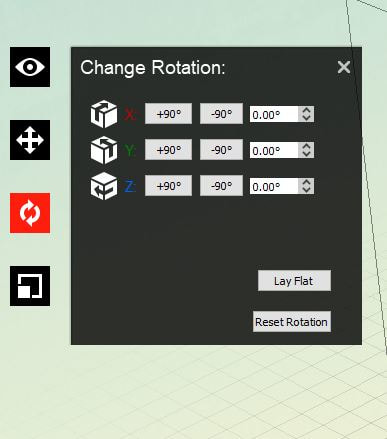
After fixing the scale, one must rotate the widget so that there are no overhanging sections of the widget. 3D printing is based off of an additive process, the printer is adding material to the project in order to create the final 3D object. Because of this, when a section of a widget is hanging off without any previous support, the 3D printer has nothing to add the material to and the project is not successful. For example, when Widget 1 is standing "upright", the top part of the "Z shape" is sticking out with any support. To combat this, one must use the rotation tool (which is the box above the scale tool, and it works the same way). One must also make sure that the object is lying on the actual printing surface in the model. To do this, simply press the "Lay Flat" button in the rotation window.
|
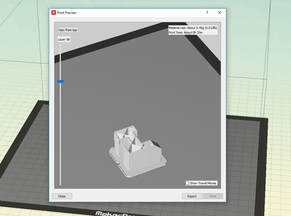
Once you have finished these steps (and have moved your widget to the center of the available space by using the move tool, which is the tool above the rotation tool), one should select the preview button. Not only does this allow a person to see all of the layers involved in creating the project, but it also lets them view how much filament the project will use. Since filament costs 6 cents per gram when using the printers for personal projects, this feature is incredibly important when it comes to figuring out how much a project will actually cost.
Then, one must simply save the MakerBot Desktop file by selecting export and then copy this file onto a flash drive. Then, one can take this flash drive and plug it into the 3D printer. Then once the printer is finished, simply take the project off of the machine and you are finished!